Enable/Disable PaperSave
You can control the PaperSave options' accessibility within PaperSave supported record types of Blackbaud Raiser's Edge using Enable/Disable option from PaperSave Options window.
Warning: You can enable PaperSave only when the current PaperSave logged in user has rights to add/view documents related to the instance. This rights can be managed from Integrated App Instances tile in the Configuration Area by the user who has "System Admin" role.
Follow the below steps to enable/disable the PaperSave options:
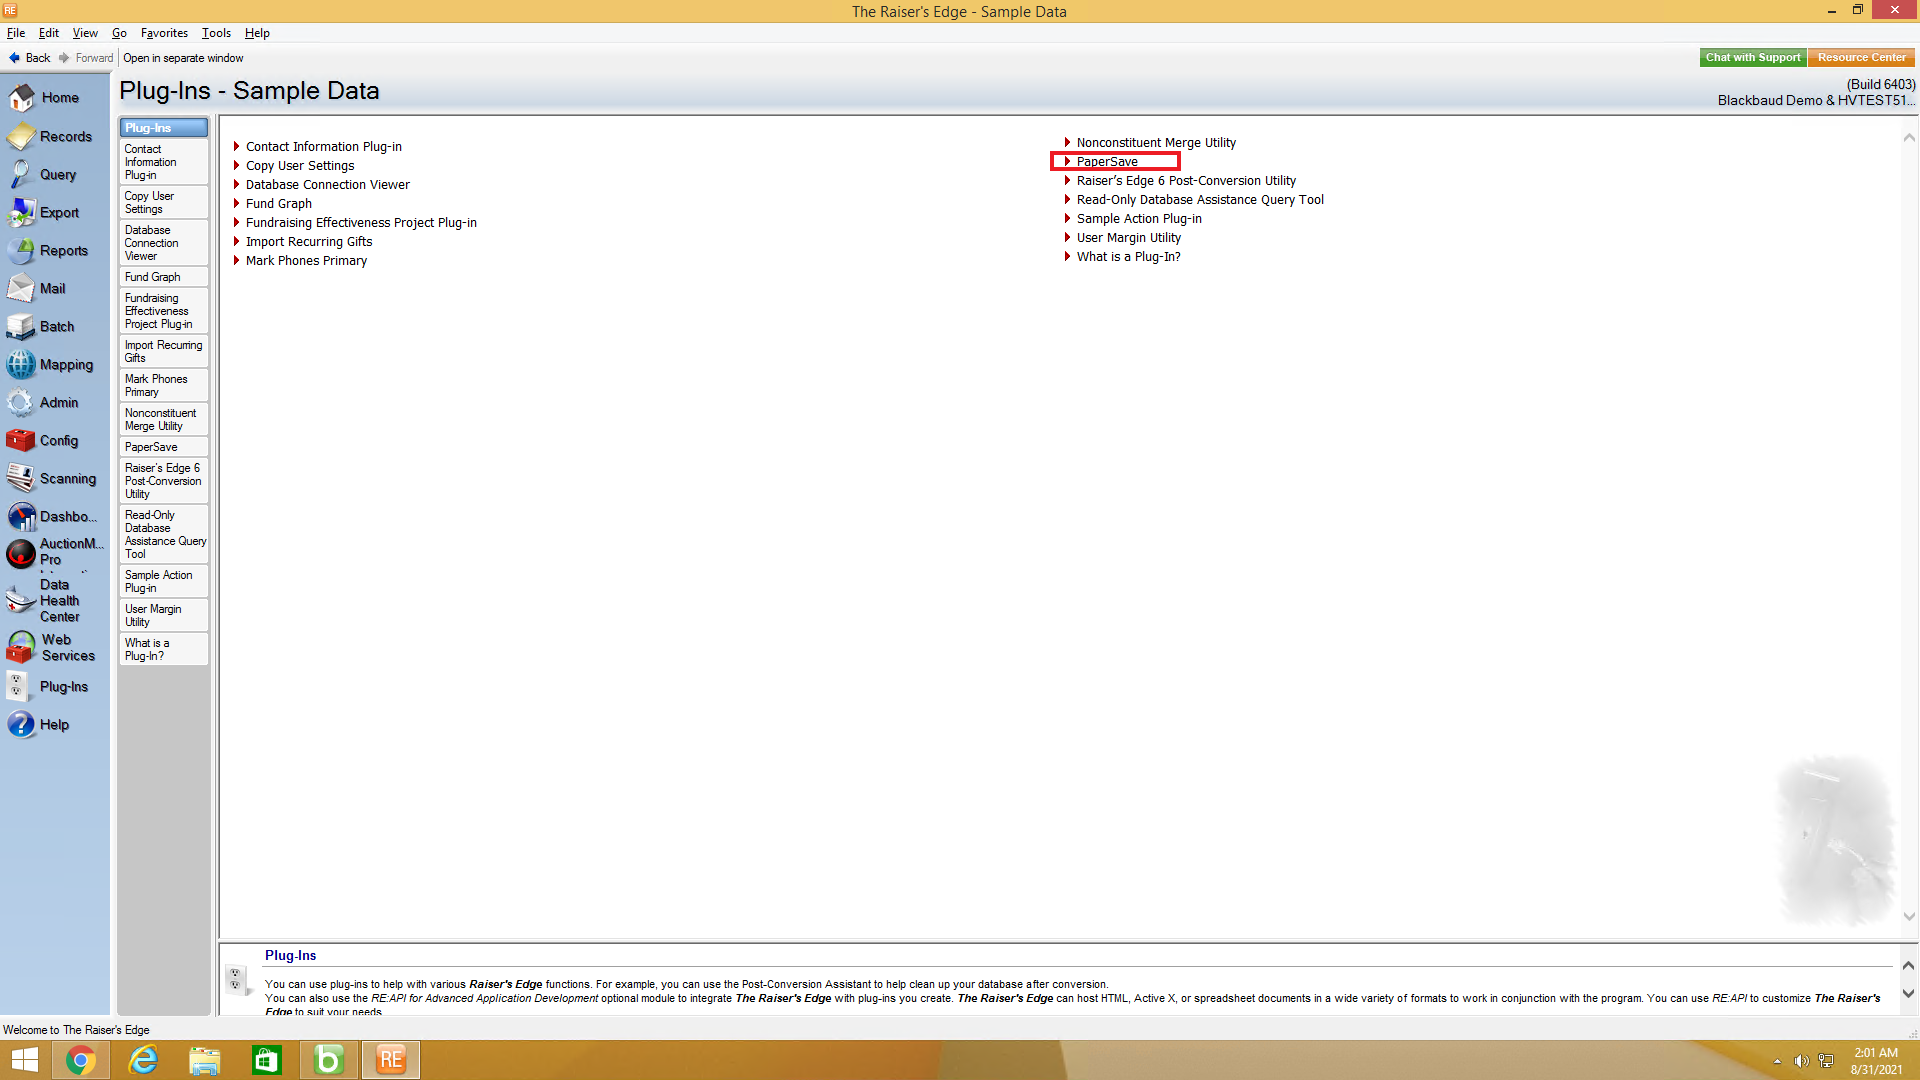
1) Navigate to Plug-Ins sections from Raiser's Edge bar and click on PaperSave to open PaperSave Options window.
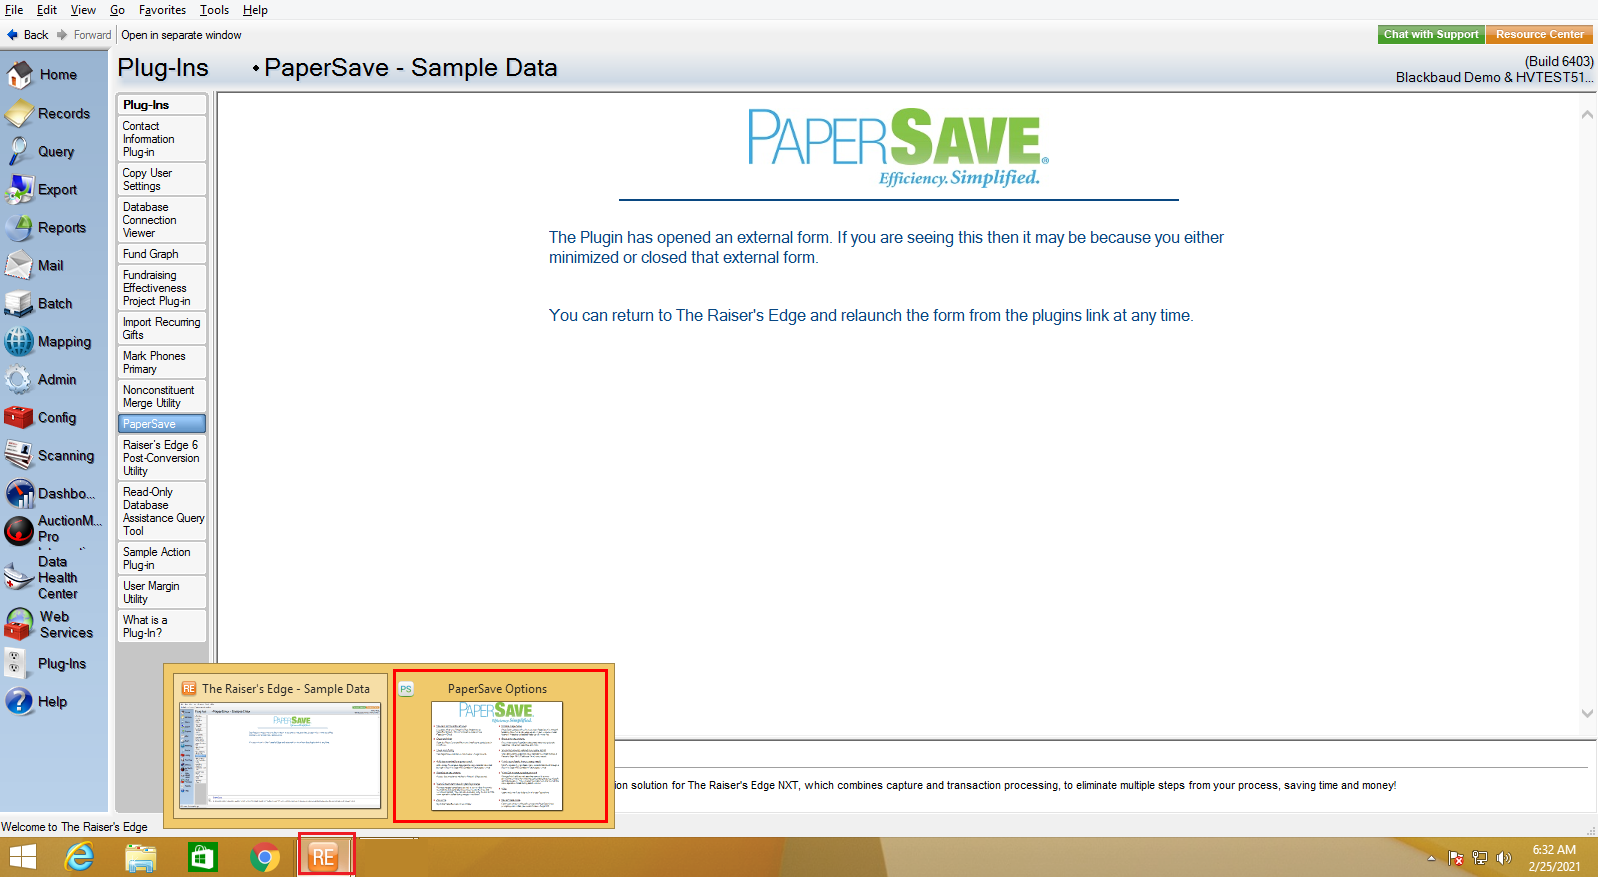
2) Once you click on PaperSave, it opens the PaperSave Options window, which gets automatically minimized. You can hover on the Raiser Edge application icon on the taskbar and select PaperSave Options to maximize the window, as shown in the below screen.
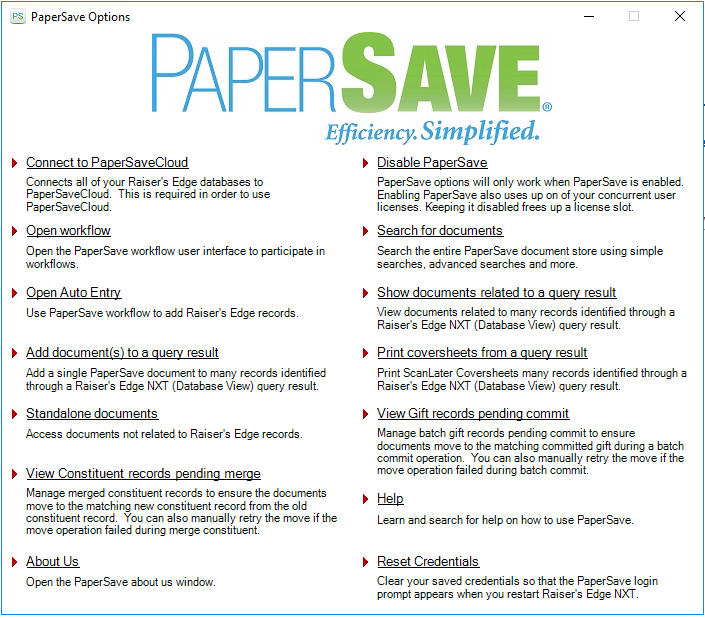
3) Within PaperSave Options Window, all the PaperSave options will be grayed out if PaperSave is disabled.
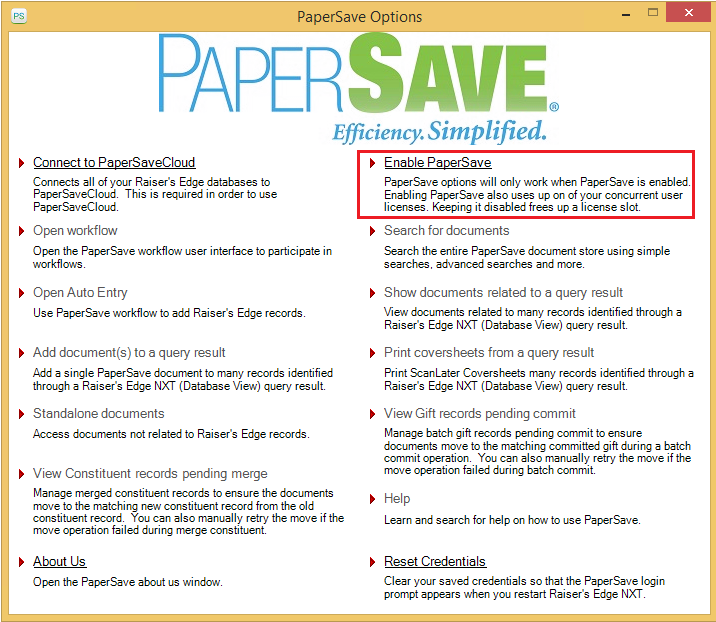
4) Click on Enable PaperSave as shown below and enter the credentials to login into PaperSave application.
Tip: Before entering the PaperSave credentials, you may want to validate the configured PaperSave tenant from the Connect to PaperSaveCloud option within PaperSave Options window. Click here to learn more about it.
5) Once you have successfully logged in, all the options within PaperSave Options window will get enabled as shown below, and PaperSave options within PaperSave supported record types will also start working.